Substance Painter plugins use the
QT Meta Language, or QML files to build their interface. From Wikipedia:
It is a JSON-like declarative language for designing user interface–centric applications. Inline JavaScript code handles imperative aspects. It is part of Qt Quick, the UI creation kit developed by Nokia within the Qt framework.
Using this information, we can start building a window with a button to execute our script.
Visual Studio Code
For this tutorial I’m going to be using
Visual Studio Code, a lightweight IDE from Microsoft. It’s not the same thing as Visual Studio, but it’s a nice scripting editor that’s available on Mac, Linux and PC. Other text editors like
Sublime will do the job quite well.
Installing QML Syntax Highlighting
- By default, QML files will appear as ordinary text files in Visual Studio Code. While this won’t stop you from being able to write the plugin, adding some QML support will make reading, organizing and editing our script easier.
- To do this, I’m going to install a QML extension in Visual Studio Code for Syntax highlighting.
- Use the View->Command Palette and type in Extensions: Install Extensions


- Type in “QML” into the search bar and install the “QML language support for Visual Studio Code” extension.
- Once it is installed, restart visual studio code- your QML files will now have syntax highlighting.
Starting our Plugin
- This is some documentation online for substance painter scripting, but your installation also comes with some example plugins.
- Plugins for Substance Painter live in
- Windows : C:\Users\*username*\Documents\Allegorithmic\Substance Painter\plugins
- Mac OS : /Users/<username>/Documents/Allegorithmic/Substance Painter/plugins
- Linux : /home/*username*/Documents/Allegorithmic/Substance Painter/plugins
- Note that for this tutorial I am using Substance Painter 2017x - the plugin directory changed since version 2.
- This is where we will be creating our plugin- be sure to look through the other plugins there to see how they work.
- Valid plugins here will automatically be detected by Substance Painter when it is first opened, and become available via the Plugins menu option.


Making a Hello World Plugin
- For a plugin to be valid, it needs to have a definition, and a main entry point qml file.
- Navigate to the plugins directory for your system.
- Create a folder here called “HelloPlugin”
- Inside the plugin, create two files-
Filling in the main file:
- The main.qml file is the entry point to your plugin.
- When the plugin is first loaded, this file will be used to initialize any additional data or properties the plugin needs, like adding extensions to the main toolbar.
- For now, we are going to make a really simple main function, which will log “Hello world!” to the console when the plugin is loaded.
 |
| Ship it! |
Filling in the JSON file:
- The JSON file contains a manifest of metadata about your plugin.
- When you use a plugin’s “About” menu in Substance painter, the data you see there is populated from the plugin.json file of the relevant plugin.
- For example, the resources-updater plugin ‘about’ window looks like this:
- And looking at the plugin.json file of the resources-updater plugin, we can see how this data is defined:

- In this case, our JSON file is defining key : value pairs which are read by Substance Painter when it loads the plugin.
- We can use the same structure in our HelloPlugin to have a simple about window available.

What we get so far:
 |
| When we load the plugin... |
 |
| Our very informative "about" window. |
- Right now we can see the plugin load, but it’s not particularly useful.
- We also get an about window courtesy of the plugin.json file.
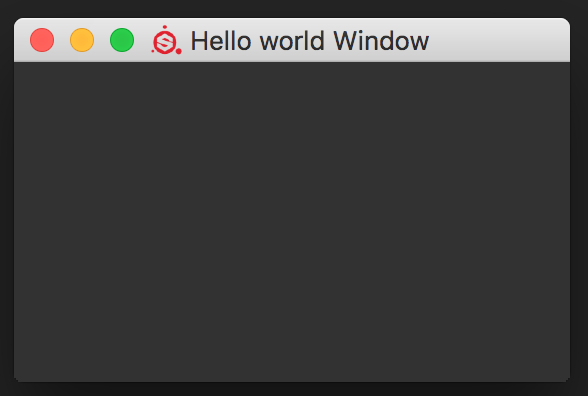
- Let’s add a window- later we can use this window to add buttons and other functionality.
Adding a window to the plugin
- Create a new file in our HelloPlugin directory.
- Name it HelloWorldWindow.qml
- This is going to where we define our window object.
- Inside the file, we are going to add just enough code to define an extremely simple window.
- A few things to note:
- The window class is imported using the import AlgWidgets 1.0 call.
- The properties are like variables on the object type.
- Assigning a specific id to an object is useful, as it allows us to reference this object elsewhere in our plugin.
- Likewise, properties like the visibility can be accessed via the object id.
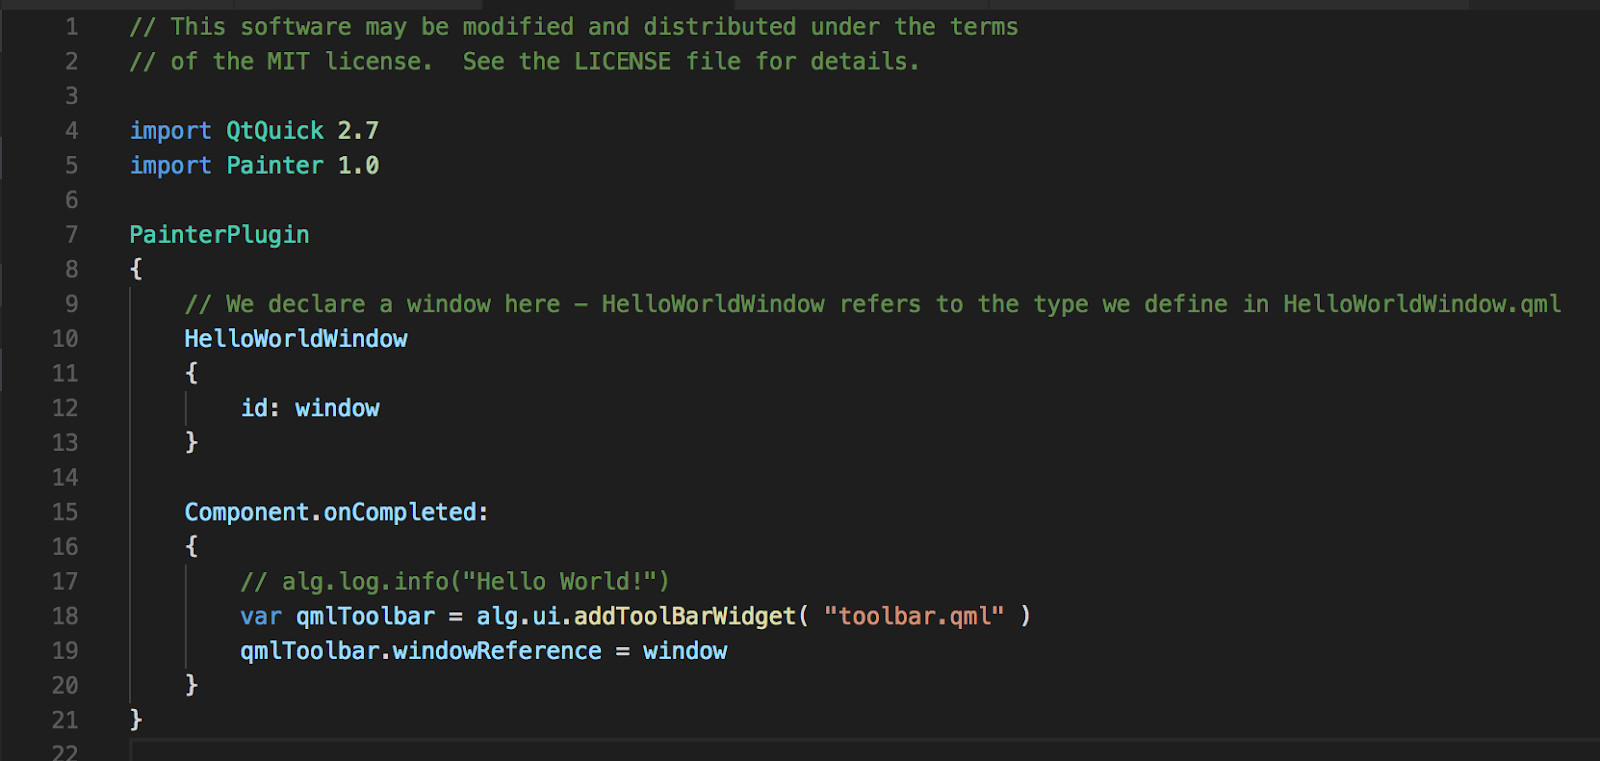
- We now have enough code to build a simple window, but before we can see our window, we need to instantiate it in the main.qml file.
- Open the main.qml file, and at the top, add the following code:

- The code above creates an instance of a HelloWorldWindow and assigns it the id “window”.
- As the window is first instantiated when the plugin is loaded, in order to see it you will need to disable and re-enable the plugin. We will fix this later.
 |
| Succinct. |
Creating a button:
- Rather than logging to the console when the plugin is loaded, let’s make a button to do that.
- Open the “HelloWorldWindow.qml” file.
- We are going to add three things-
- A series of layout elements.
- A label.
- A button.
- QML windows are created using a series of nested layout objects- for our purposes we are going to use a column, a rectangle and a row.
- We need to add additional import statements to access these object types- QtQuick and QtQuick.Layouts.
- The column represents the overall layout- elements will be stacked within this shape in the order that they are added.
- The rectangle allows us to fill a partition of this column with a child layout.
- Finally the row layout allows us to add elements that will be rendered from left to right in the order in which they were added.
- Adding an AlgLabel and AlgButton in the row layout adds two new elements to our window.
- Finally defining the “onClicked” event for the button replaces where we were logging in main.qml on startup.

- I also commented out our log in the main.qml file.
 |
| Our button is very chatty. |
Reloading your script:
- At this point it’s good to know you can reload your script on the fly using the Plugins->HelloPlugin->Reload menu in painter. This is going to be super useful as we add more complexity.
Adding our plugin to our toolbar:
- Right now if you close the plugin window, it’s gone until you restart the plugin.
- To solve this issue, let’s add a button to the toolbar.
- The button in the toolbar is going to be pretty simple- all it’s going to do is toggle the visibility of our plugin window when it is pressed.
- First, we are going to make our HelloPluginWindow start invisible.
- We do this by changing the ‘visible’ property from ‘true’ to ‘false’ in the HelloPluginWindow.qml file.
- Now we are going to make a new file called ‘toolbar.qml’
- It’s pretty simple, and similar to what we have done before- it’s just a row, with a button.
- Something important- the property variable “windowReference” will be filled in by our plugin when it is loaded.
- Because locally the windowReference starts as null, we wrap the calls to it later inside a try/catch block.
- This will stop terrible things from happening, like a crash, if something elsewhere in our script stops us from being able to make the window- instead of a crash we can log information to the console.
 |
| catch(err), catch(err) not a belly scratch(err)... |
- Finally, in our “main.qml” file, we are going to add an new toolbar widget, which will instantiate our “toolbar.qml” as a button on the toolbar.
- We also assign our HelloWorldWindow instance to the windowReference variable in our toolbar button, using it’s id.

- The end result is a giant blot on the toolbar that we can click to turn our window on and off:
 |
| Now thats UI... |
Adding an icon
- Finally, even with as good as our giant white square looks, we can add an icon.svg file to our plugin and add it to the toolbar.qml script to make it more appealing.
- This icon will be used in the substance toolbar to show us which button is linked to our window.
- Wikimedia commons has some good free svg files. For our purposes I am going to use this one.
- To add the icon to our toolbar, we need to add an Image block.
- This is what we are going to end up with:
 |
| Hi! What a friendly little widget. |
- To make the icon to render correctly, we need to assign it a rectangle area, and make an image widget which is the child of that area.
- Using the Rectangle area gives us control over the hover state colors, and the anchors.
- The Rectangle is a child of the Button widget, and will inherit the button’s size information by using the “anchors.fill: parent” hint.
- We make sure the image also inherits these size settings by using the same hint in the child Image widget.
- This is the code we end up with:
- Beside giving us a nice little icon, there is something interesting going on where we define the color of the rectangle based off the hover state.
 |
| This is called a ternary operator, defined by the ? symbol. |
- In this instance the rect.hovered boolean allows us to change the assignment of a variable based on the state of a boolean.
- The hovered state can also let us add some other cool things, like animations, to our widgets.
Making our icon animate:
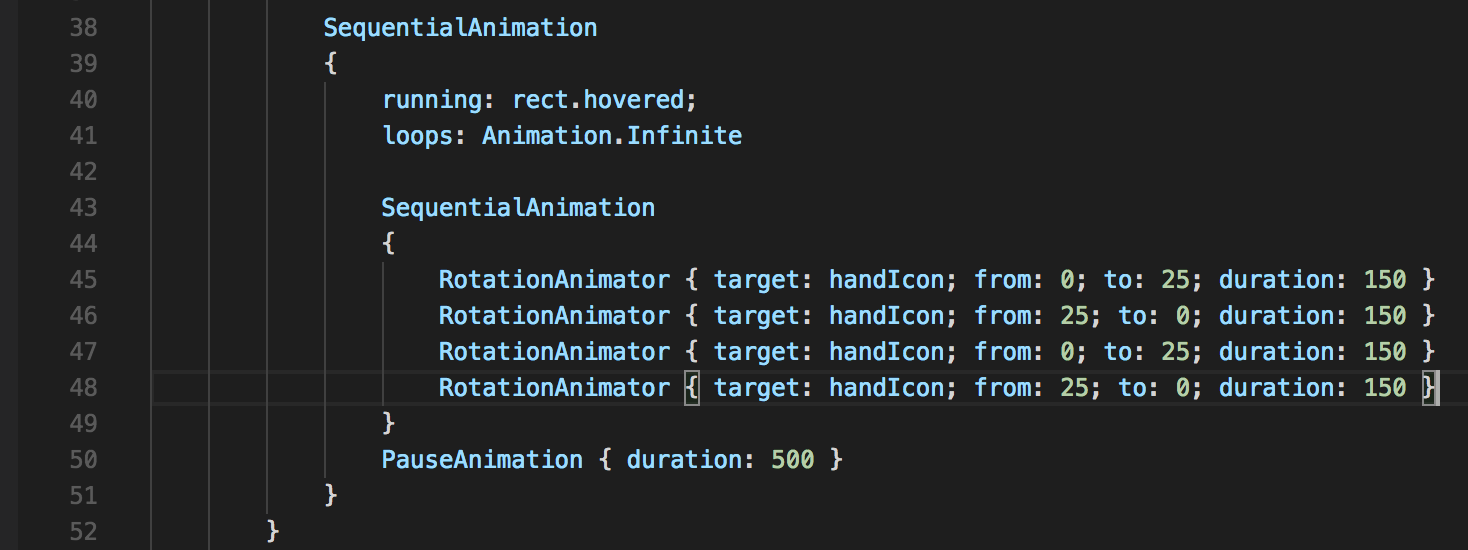
- As a fun little exercise, we are going to animate the hand using qml animation sequences.
- Let’s make the hand wave at us.

- Using this code, our hand will wave at us twice each time we hover over it.
 |
| Hellloooooo! |
- Note that the sequence is actually made out of a number of nested animations. These will run top to bottom, and in the cast of the nested sequence, each animation nested in that sequence will play before moving to the next animation in the parent sequence.
- Using this technique, you are able to add some complex behaviors to your widgets.
So that's it for adding a basic plugin to Substance Painter! I'm going to follow this up with another post where we actually make it do something
useful...
-Pete


Comments
Post a Comment